
Winter-Proof Your Outdoor Lighting: A UK Checklist for Porches, Paths and Patios
A practical UK guide to getting porch, path and patio lights through winter — IP ratings, seals, timers...

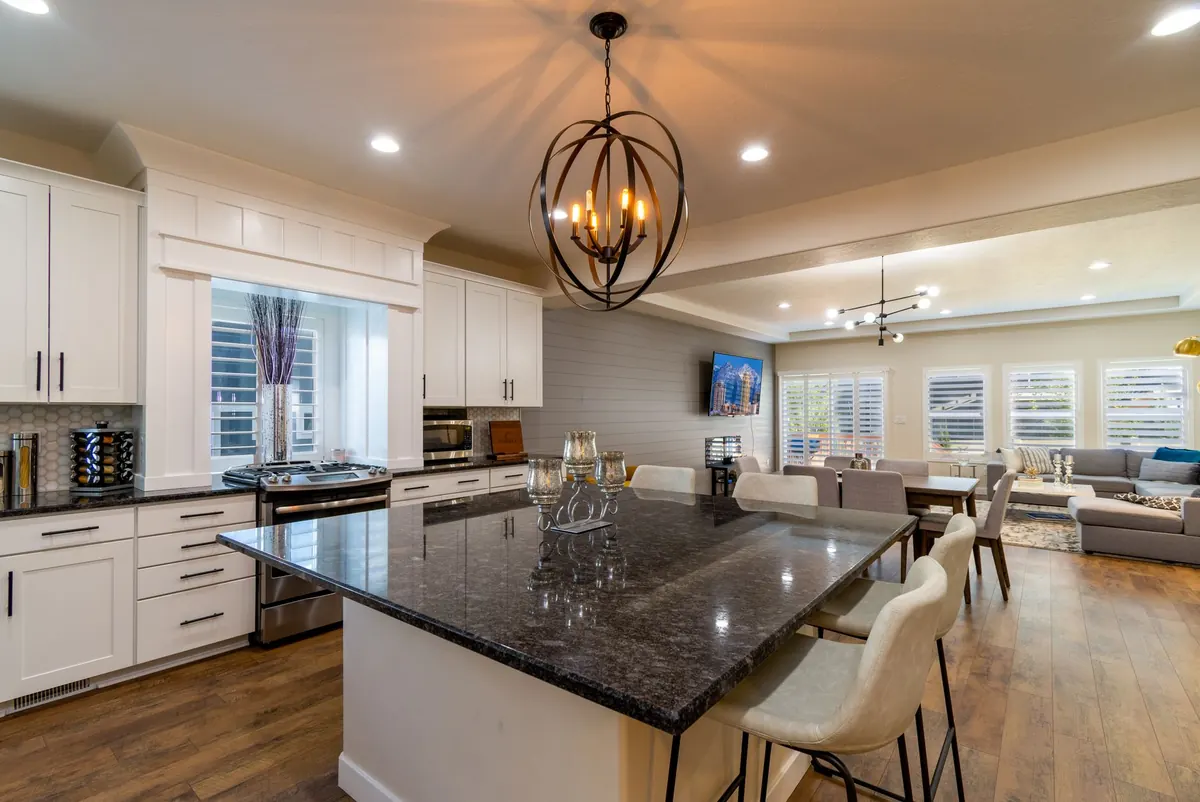
Kitchen islands earn their keep: prep, homework, a glass of wine while someone else cooks. Pendant lights above them do two jobs at once, lighting the worktop and setting the look of the whole room. They are also the fittings people most often get wrong — hung too high, or squeezed in one too many.
None of it is difficult once you have three measurements and a little patience. Here is how to work out the height, the number and the spacing for a typical UK kitchen.
Before you look at a single pendant, write these down:
Note anything already up there too: an extractor, a ceiling rose, a beam, a sloped ceiling, a joist you can fix into. A pendant can weigh two or three kilos, more if it is a cluster or a large glass shade, and it needs a solid fixing point rather than bare plasterboard.
Then stand in the doorway and look at the room. Pendants are often the first thing a visitor sees, so their height has to sit well against the room, not just against the worktop.
The usual guidance is a bottom-of-shade height of 75–85cm above the worktop. That puts the shade at roughly eye level for a standing adult, which does two useful things: light falls onto the worktop, and your sightline across the island stays clear so you can talk to whoever is on the other side.
Hang them above 85cm and the fitting starts to look stranded, floating in the gap between worktop and ceiling. Hang them below 70cm and they crowd the surface — you will duck around them, and they will catch every splash from the sink.
Most UK ceilings are around 2.4m, which leaves roughly 1.5m between worktop and ceiling. If yours is lower, hang the shades a touch higher, nearer 70–75cm, and choose a shallow or open shade. A deep drum shade eats vertical space quickly and can make a small kitchen feel tight.
With a 3m ceiling there is plenty of room, but a long thin drop looks odd. Keep the height above the worktop roughly the same, then scale up: larger shades, a longer rod or flex, or several pendants in a row so the group holds its own. A tiny shade on a very long flex is the one to avoid.
If the island doubles as a breakfast bar, the pendant has to clear more than just the worktop. Measure from the highest surface a person will sit at — if your island has a raised bar section, that means the bar top rather than the prep surface, and the shade sits 75–85cm above it.
Seated eye level is roughly 1.2m from the floor, so a shade hanging at 80cm above a 90cm worktop puts its bottom around 1.7m up: comfortably above the eyeline of anyone perched on a stool. Go lower and your guests spend the evening staring into the bulb. If you plan to eat at the island rather than just perch there, stay at the top of the range and choose an opal or frosted shade that softens the glare, or a shade deep enough to hide the bulb from below.
One more thing to check: stool heights vary. A 65cm stool at a 90cm worktop leaves far less knee and head room than a 75cm one. Mock up the seating before you commit to a height.
There is no single answer, but there is a reliable starting point: one pendant for roughly every 60–75cm of island length. A 1.5m island takes two; a 2.4m island takes three; anything past 3m usually wants four or five, or two clusters.
Odd numbers sit more comfortably on the eye than even ones. Two pendants over a long island can read as a mistake rather than a decision, whereas three read as a group. The exception is the short island — under about 1.8m — where two is the only sensible answer.
Whatever number you land on, the pendants must relate to the island, not the ceiling. Centre them on the island's midline, front to back, and if the island is not centred in the room, do not try to line the lights up with the room's centre — the offset will be the first thing anyone notices.
Once you know the number, space them like this:
An example: a 2.7m island with three pendants. The first sits at 30cm, the last at 240cm, leaving 210cm between them. Two gaps means 105cm centre-to-centre. With 30cm shades that leaves 75cm of clear space between each fitting — generous, airy and easy to clean around.
If that feels too spread out, tighten the ends. Bringing the outer pendants 45cm in gives 90cm centre-to-centre and a more intimate feel. There is no regulation here, only proportion. The most common visual error is cramming the shades together so they merge into one long bar of light, which is why a minimum of 45–50cm between shade edges is a useful floor.
Pendant diameter is not an afterthought — it decides whether the arrangement looks deliberate. As a rule of thumb, a single pendant should be roughly one third of the island's depth: about 30cm for a standard 90cm island, 25cm for a slim 70cm one. Go bigger and the shade dominates; go smaller and it disappears against the ceiling.
For a row of pendants, add the diameters together with the gaps and aim for the run of lights to cover roughly two-thirds of the island's length. Big, deep shades need more clearance, so if you are tempted by a wide drum, hang it nearer 85cm than 75cm — and check it does not block your view across the room.
Hang a paper mock-up at 80cm and leave it up for a day. The eye is a far better judge of proportion than a tape measure.
Cut a piece of card to the size of the shade, tape it to a broom handle, and hold it at 75cm, 80cm and 85cm above the worktop. Look at it from the doorway, from the far side of the room, and from a stool. The height that feels right from all three is the one to use. It takes ten minutes and saves an afternoon of filling holes.
Get the height, number and spacing right, and the pendants do their job quietly: useful light on the worktop, a clear sightline across the island, and a room that looks finished rather than accessorised.
Photo: Get Lost Mike / Pexels
A practical UK guide to getting porch, path and patio lights through winter — IP ratings, seals, timers...
A practical checklist for lighting a child's bedroom well — covering safety, night lights,...
Confused by smart bulbs? Here's how hubs, apps, voice control, dimming and UK fittings such as B22 and...